Learn how to make a money box from scratch with this . From choosing a design to decorating and securing the box, become a DIY enthusiast and start saving money in style.
Materials Needed for Making a Money Box
Making a money box can be a fun and creative project that allows you to save money in a personalized way. To get started, you will need a few materials that are easily accessible. Let’s take a look at what you will need:
Cardboard
Cardboard is the primary material you will need for making a money box. It is sturdy, readily available, and easy to work with. You can recycle old cardboard boxes or use cardboard sheets from a craft store. The thickness of the cardboard should be sufficient to hold the shape of the box once it is assembled.
Scissors
Scissors are an essential tool for cutting the cardboard into the desired shapes. Make sure to use a pair of sharp scissors that can easily cut through the cardboard without causing any damage. It is important to have precise cuts to ensure that the money box is well-constructed.
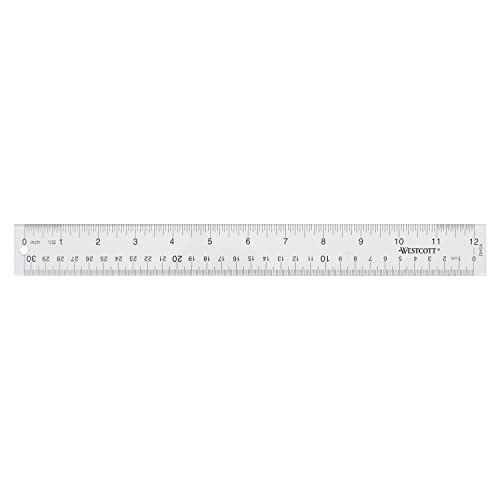
Ruler
A ruler is necessary for measuring and marking the dimensions of the cardboard. It helps in ensuring accurate cuts and symmetrical shapes. When choosing a ruler, opt for one that is sturdy and has clear markings. A metal or plastic ruler with both inches and centimeters is ideal for this project.

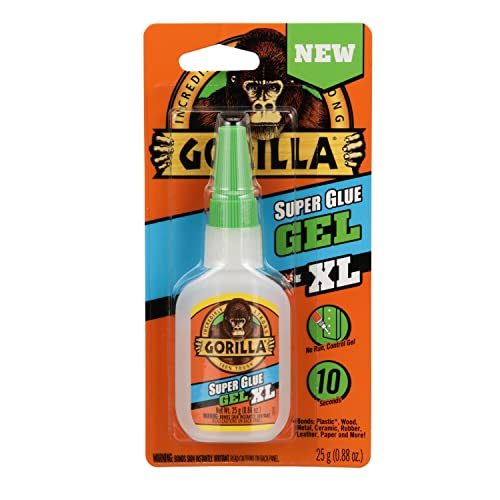
Glue or Tape
To assemble the cardboard pieces and hold them together, you will need glue or tape. Both options can work effectively, so choose whichever you are more comfortable with or have readily available. If you decide to use glue, make sure it is suitable for bonding cardboard. For tape, opt for a strong adhesive that can securely hold the edges of the cardboard.
Now that you have gathered all the necessary materials, you are ready to move on to the next step of choosing a design for your money box. Let’s explore the different design options available.
Choosing a Design for Your Money Box
When it comes to designing your money box, there are several options to consider. You can choose a simple rectangular box, an animal-shaped box, or even a house-shaped box. Each design has its own unique charm and can be customized to reflect your personal style. Let’s delve into these design choices:
Simple Rectangular Box
A simple rectangular box is a classic design that is easy to make and functional. It provides a spacious interior to hold a significant amount of money and can be decorated in various ways. You can keep it plain and elegant or unleash your creativity by adding colors, patterns, or personal touches.
Animal-Shaped Box
If you want to add a touch of whimsy to your money box, an animal-shaped design is a great choice. Whether it’s a cute piggy, a majestic lion, or a friendly elephant, the possibilities are endless. You can either draw the animal’s shape on the cardboard or cut out templates to trace and assemble. This design is especially popular among children and animal lovers.

House-Shaped Box
For those who prefer a more unique and decorative money box, a house-shaped design is worth considering. This design allows you to create a miniature house with a slot for inserting money. You can get creative with different architectural styles, such as a cozy cottage or a modern mansion. It’s a great way to showcase your craftsmanship and add a charming touch to your money-saving routine.
Now that you have decided on the design for your money box, it’s time to move on to the next step of measuring and cutting the cardboard. Let’s learn how to determine the size of the box and mark and cut the cardboard pieces accurately.
Choosing a Design for Your Money Box
When it comes to making a money box, one of the first decisions you’ll need to make is what design you want to go with. The design you choose will not only determine the overall look of your money box, but it can also affect how easy or difficult it is to make. Let’s explore three popular design options: the simple rectangular box, the animal-shaped box, and the house-shaped box.
Simple Rectangular Box
The simple rectangular box is a classic design that is both timeless and versatile. It’s a great option for those who prefer a minimalist look and want a straightforward construction process. To make a simple rectangular money box, you’ll need to gather your materials, such as cardboard, scissors, a ruler, and glue or tape. Measure and cut the cardboard to the desired size, then fold and assemble the box. You can add a coin slot and decorate it however you like. The simplicity of this design allows for endless customization options, making it a popular choice for both kids and adults.
Animal-Shaped Box
If you’re looking for a fun and whimsical money box, an animal-shaped design might be just what you need. Whether you choose to make a piggy bank, a cat, a dinosaur, or any other animal, this design adds a playful touch to the process. Start by selecting the animal you want to create and gather the necessary materials. Depending on the complexity of the design, you may need additional tools like craft foam, googly eyes, or pipe cleaners. Cut the cardboard into the required shapes, assemble the pieces, and add the finishing touches to bring your animal-shaped money box to life. Kids especially love this design as it allows them to unleash their creativity and imagination.
House-Shaped Box
For those who want to take their money box to the next level, a house-shaped design offers a unique and charming option. This design is perfect for those who want to create a money box that resembles a miniature house, complete with doors, windows, and a roof. To make a house-shaped money box, gather your materials and decide on the size and style of the house you want to create. Cut and fold the cardboard to form the walls, roof, and other components of the house. Assemble the pieces using glue or tape and add any additional details, such as a chimney or flower boxes. This design is not only functional but also serves as a decorative piece that can be displayed in your home.
By considering these different design options, you can choose the one that best suits your preferences and skill level. Whether you opt for the simplicity of a rectangular box, the playfulness of an animal-shaped box, or the charm of a house-shaped box, each design offers a unique and enjoyable experience. Remember to gather all the necessary materials and follow the step-by-step instructions for each design to ensure a successful outcome.
To help you visualize the different design options, here’s a comparison table:
| Design | Description | Difficulty Level |
|---|---|---|
| Simple Rectangular Box | Classic and versatile design | Easy |
| Animal-Shaped Box | Fun and whimsical design | Moderate |
| House-Shaped Box | Charming and decorative design | Difficult |
Now that you have a better understanding of the design options available, you can choose the one that sparks your creativity and get started on making your own unique money box. Remember to have fun throughout the process and let your imagination run wild!
Measuring and Cutting the Cardboard
When it comes to making a money box, one of the most important steps is measuring and cutting the cardboard. This process will determine the size and shape of your box, so it’s crucial to get it right. In this section, we will explore how to determine the size of the box and how to mark and cut the cardboard pieces.

Determining the Size of the Box
Before you start cutting the cardboard, you need to determine the size of the box you want to make. Consider how much money you plan to save and what you will be using the money box for. If you’re making a money box for loose change, a smaller size might be sufficient. However, if you plan to save larger bills or even small items, you may want to opt for a larger size.
To determine the size, think about the dimensions you want for your box. Measure the length, width, and height that you desire. You can use a ruler or measuring tape for accuracy. Once you have these measurements, you can move on to marking and cutting the cardboard pieces.
Marking and Cutting the Cardboard Pieces
Now that you have the measurements for your money box, it’s time to mark and cut the cardboard pieces. Start by laying out your cardboard on a flat surface, ensuring it is clean and free from any debris.
Using a ruler or straight edge, mark the dimensions of each side of the box on the cardboard. Make sure to account for the thickness of the cardboard when marking the dimensions. This will ensure a snug fit when assembling the box.
Once you have marked all the sides, use a pair of scissors or a utility knife to cut along the marked lines. Take your time and use smooth, steady strokes to ensure clean cuts. It’s important to be precise with your cutting to ensure that the pieces fit together properly.
After cutting out all the pieces, double-check their dimensions to ensure they match the measurements you initially determined. If any adjustments need to be made, use the scissors or utility knife to trim the edges accordingly.
Assembling the Money Box
With the cardboard pieces cut to the correct size, it’s time to assemble your money box. This step involves folding the cardboard pieces and securing them together using glue or tape.
Folding the Cardboard Pieces
To begin assembling the money box, start by folding the cardboard pieces along the marked lines. This will create the basic structure of the box. Use a ruler or your fingers to ensure clean, crisp folds.
Once the cardboard pieces are folded, you can start joining them together to form the box shape. Apply glue or use tape along the edges where the pieces meet to secure them. Make sure to press firmly to ensure a strong bond.
Gluing or Taping the Box Together
Depending on your preference and the materials you have available, you can choose to either glue or tape the box together. If you opt for glue, apply a thin layer along the edges of the cardboard pieces and press them firmly together. Allow the glue to dry completely before moving on to the next step.
If you choose to use tape, apply it along the edges where the pieces meet. Make sure to overlap the tape slightly to ensure a secure hold. Press the tape firmly to ensure it adheres properly.
Remember to take your time during this step to ensure that the box is assembled securely. Any loose or weak connections may compromise the integrity of the money box.
Congratulations! You have successfully measured and cut the cardboard pieces for your money box and assembled them together. The next step is to add a coin slot, which will allow you to deposit money into your box easily. But before we move on, take a moment to appreciate your progress. You’ve already come a long way in creating your very own money box! Keep up the great work and let’s continue building it together.
(*Note: The following sections will cover adding a coin slot, decorating the money box, securing it, and using/maintaining it.)
Assembling the Money Box
Assembling your money box is where all your hard work pays off and you start to see your creation take shape. In this section, we will go through the process of folding the cardboard pieces and then gluing or taping the box together.
Folding the Cardboard Pieces
To start assembling your money box, you will need to fold the cardboard pieces in the correct way. This step is essential to ensure that your box is sturdy and secure.
- Start by taking one of the cardboard pieces that you have cut out according to the measurements you determined earlier. Lay it flat on a clean and smooth surface.
- Carefully fold along the scored lines that you marked earlier. These lines will help you create the sides and bottom of your box.
- Fold each side of the cardboard piece upwards, making sure to align the edges as accurately as possible. This will create the walls of your money box.
- Once you have folded all the sides, use your fingers to press along the folds, ensuring that they are crisp and secure. This will help your box maintain its shape.
Gluing or Taping the Box Together
After folding the cardboard pieces, it’s time to join them together using glue or tape. This step is crucial to ensure that your money box is strong and durable.
- If you choose to use glue, apply a small amount along the edges of one of the folded sides. Make sure to spread the glue evenly to ensure a secure bond.
- Press the glued side firmly against the corresponding side of the box. Hold it in place for a few seconds to allow the glue to set.
- Repeat this process for the remaining sides of the box, applying glue and pressing them together firmly. Make sure all the sides are aligned properly to create a neat and professional-looking box.
- If you prefer to use tape, you can use strong adhesive tape or duct tape. Start by placing a strip of tape along one of the edges of the folded side, making sure it extends slightly beyond the edge.
- Fold the taped edge over to the inside of the box and press it firmly to secure it in place. Repeat this process for the other sides of the box, overlapping the tape slightly at the corners for added strength.
- Once all the sides are securely glued or taped together, check the box for any loose edges or gaps. If you find any, apply more glue or tape to reinforce those areas.
Congratulations! You have successfully assembled your money box by folding the cardboard pieces and gluing or taping them together. Now it’s time to move on to the next step, which is adding a coin slot.
Remember, the quality of your assembly will determine the durability and functionality of your money box. Take your time, be patient, and ensure that all the folds are secure and the sides are aligned correctly.
By following these instructions, you will create a money box that not only serves its purpose but also looks impressive. So let’s move on to the next section and learn how to add a coin slot to your money box.
[Table: Materials Needed for Assembling the Money Box]
| Materials Needed |
|---|
| Cardboard pieces |
| Scissors |
| Glue or tape |
| Ruler |
| Marking tool |
Adding a Coin Slot
Choosing the Location for the Coin Slot
When it comes to adding a coin slot to your money box, choosing the right location is crucial. You want to ensure that it is easily accessible for inserting coins, but also secure enough to prevent them from falling out accidentally. Consider placing the coin slot on the top or side of the box, depending on the design and functionality you prefer.
One option is to position the coin slot on the top of the box. This allows for a straightforward insertion of coins without the need to tilt or turn the box. It is a user-friendly option, especially for children or individuals with limited dexterity. Additionally, having the coin slot on the top makes it easy to see how much money has been collected without the need to open the box.
Another option is to place the coin slot on the side of the box. This can provide a more discreet and aesthetically pleasing design, as the slot is not visible from the top. It also allows for a larger opening, accommodating bills or larger coins if desired. However, keep in mind that this placement may require some tilting or shaking of the box to ensure that the coins reach the bottom.
Cutting a Slot in the Cardboard
Once you have determined the ideal location for your coin slot, it’s time to cut a slot in the cardboard. This step requires precision and attention to detail to ensure a clean and functional slot.
Start by measuring the desired width of the slot. Use a ruler to mark the width on the cardboard, ensuring it is wide enough to accommodate the largest coin you plan to collect. It’s essential to make the slot slightly narrower than the coin to prevent it from falling out accidentally.
Next, use a sharp pair of scissors to carefully cut along the marked line. Start with a small incision and gradually extend it to create the desired length. Take your time to maintain a straight line and avoid any jagged edges that could potentially damage the coins or bills.
Remember to position the slot at a height that allows easy access for inserting coins. If you plan to collect larger bills, consider making the slot longer to accommodate their size. Once the slot is cut, gently smooth out any rough edges with sandpaper or a file to ensure a neat finish.
Now that you have successfully added a coin slot to your money box, you are one step closer to creating a functional and personalized savings tool. In the next section, we will explore various ways to decorate your money box and make it truly unique. Stay tuned!
- Choosing the right location for the coin slot is crucial for functionality and accessibility.
- Consider placing the coin slot on the top or side of the box, depending on your preferences.
- Cutting a slot in the cardboard requires precision and attention to detail.
- Measure the desired width and use a ruler to mark the cardboard.
- Cut along the marked line with sharp scissors, maintaining a straight and clean edge.
- Smooth out any rough edges with sandpaper or a file for a neat finish.
Decorating Your Money Box
When it comes to decorating your money box, you have a variety of options to choose from. Personalizing your money box not only adds a touch of creativity and uniqueness but also makes it more appealing to use and display. Let’s explore some fun and creative ways to decorate your money box.
Painting the Box
One of the simplest and most popular ways to decorate your money box is by painting it. Painting allows you to add color and patterns that reflect your personal style and preferences. You can use acrylic paints, spray paints, or even watercolors to achieve different effects.
To get started, gather your painting supplies, including brushes, paint, and a palette. Prepare your workspace by covering it with newspaper or a drop cloth to avoid any accidental spills or stains.
Before painting, you may want to lightly sand the surface of the box to ensure better paint adhesion. This step is especially important if your money box has a glossy or varnished finish. Once the surface is prepared, use a primer to create a smooth base for your paint.
Now it’s time to let your creativity flow! Think about the design you want to create. You can go for a simple, solid color or experiment with patterns, stripes, or even paint your favorite characters or symbols. Use different brush sizes to add depth and detail to your design.
Remember to let each layer of paint dry completely before applying the next one. This will prevent smudging or mixing of colors. Once you’re satisfied with your painted design, you can add a clear topcoat or varnish to protect the paint and make it more durable.
Adding Stickers or Decals
If you prefer a quicker and easier way to decorate your money box, adding stickers or decals is a fantastic option. Stickers and decals come in various shapes, sizes, and designs, allowing you to customize your money box according to your preferences.
Start by selecting stickers or decals that match your desired theme or style. You can choose from a wide range of options, including cute animals, inspirational quotes, or even your favorite cartoon characters. Make sure the stickers or decals are adhesive enough to stick well to the surface of your money box.
Clean the surface of your money box with a damp cloth to remove any dust or debris. This will ensure better adhesion for the stickers or decals. Carefully peel off the backing of the sticker or decal and position it on the desired spot of your money box. Smooth out any air bubbles or wrinkles using your fingers or a credit card.
You can get creative with the placement of the stickers or decals. Create patterns or arrange them in a collage-like manner. If you make a mistake or want to change the design, stickers and decals are easy to remove and reposition.
Using Markers or Pens to Add Designs
If you enjoy doodling or have a knack for drawing, using markers or pens to add designs to your money box can be a fun and personalized option. This method allows you to showcase your artistic skills and create unique designs directly on the surface of your money box.
Start by gathering an assortment of permanent markers or pens in various colors. Make sure to choose markers or pens that are suitable for the material of your money box. For example, if your money box is made of cardboard, use markers that won’t bleed or smudge on the surface.
Think about the design or pattern you want to create. You can draw intricate patterns, write inspiring quotes, or even draw your favorite characters. Sketch your design lightly with a pencil first, if desired, to ensure accuracy and symmetry. Then, go over your sketch with the markers or pens, adding bold lines and vibrant colors.
Don’t be afraid to experiment and add details to your design. You can create shading, highlights, or use different techniques like cross-hatching or stippling to add depth and texture. Remember, this is your chance to let your creativity shine!
Once you’re done with your design, let the markers or pens dry completely. This will prevent smudging or smearing. If you want to protect your artwork, you can apply a clear sealant or varnish over the design.
Securing the Box
When it comes to making your own money box, it’s important to ensure that it is secure. After all, you want to keep your hard-earned money safe and protected. In this section, we will explore various ways to secure your money box, including closing the top, reinforcing the corners, and adding a lock or seal.
Closing the Top of the Box
One of the first steps in securing your money box is to properly close the top. This will prevent any unwanted access to the contents inside. There are a few methods you can use to achieve this.
One simple way is to fold the flaps of the cardboard box over each other, creating a tight seal. You can then secure the flaps with glue or tape. This method ensures that the top of the box remains closed and prevents any accidental spillage of your money.
Another option is to create a lid for your money box. This can be made from a separate piece of cardboard that fits snugly over the top of the box. You can attach the lid using glue or tape, ensuring that it is secure and not easily removable. This adds an extra layer of protection to your money box.
Reinforcing the Corners
To further enhance the security of your money box, it is a good idea to reinforce the corners. This will make the box more durable and less prone to damage. Reinforcing the corners also adds stability, ensuring that the box remains intact even if it is accidentally dropped or mishandled.
One way to reinforce the corners is by using additional pieces of cardboard. Cut small rectangles or squares from cardboard and attach them to the corners of the box using glue or tape. This will provide extra support and prevent the corners from becoming weak or susceptible to damage.
Another option is to use corner brackets or metal reinforcements. These can be purchased from hardware stores and are specifically designed to strengthen the corners of various objects. Simply attach the corner brackets to the corners of your money box using screws or nails. This will significantly increase the durability of the box.
Adding a Lock or Seal
If you want to take the security of your money box to the next level, consider adding a lock or seal. This will ensure that only you have access to the contents inside and provide peace of mind.
One option is to use a small padlock. You can attach the padlock to the front of the box, securing it with a latch or hasp. This will require a key or combination to open, adding an extra layer of protection against unauthorized access.
Alternatively, you can use tamper-evident seals. These seals are designed to show if a box has been tampered with. They are often used in transportation or storage of valuable items. Simply attach the seal to the opening of your money box, ensuring that it cannot be removed without leaving evidence of tampering.
By adding a lock or seal to your money box, you can rest assured that your money is secure and protected from any potential theft or tampering.
To summarize, securing your money box is crucial to keep your money safe. Remember to close the top of the box properly, reinforcing the corners for added durability, and consider adding a lock or seal for enhanced security. By taking these measures, you can have peace of mind knowing that your hard-earned money is well-protected.
Using and Maintaining Your Money Box
Congratulations on creating your very own money box! Now that you have your money box ready, let’s dive into how to use and maintain it effectively.
Inserting Coins and Bills
Inserting coins and bills into your money box is a simple and straightforward process. Begin by identifying the slot on your money box where you can insert your money. It can be a designated coin slot or a wider opening for both coins and bills.
To insert coins, hold them between your fingers and drop them one by one into the slot. Make sure to insert them gently to avoid any damage to the box or the coins themselves. If you have bills to insert, fold them neatly and slide them into the slot, ensuring they go all the way in.
Remember to be mindful of the capacity of your money box. If it starts to get full, you may need to empty it to make room for more coins and bills.
Emptying and Counting the Contents
Emptying and counting the contents of your money box can be an exciting and rewarding experience. When you feel that your money box is getting full or you simply want to see how much you’ve saved, follow these steps:
- Find a clean and flat surface to work on. This will make the counting process easier and more organized.
- Open the top of your money box. Depending on the design, you may need to unlock or remove a cover or lid.
- Carefully pour the contents of your money box onto the surface. Take your time to ensure that all coins and bills have been emptied.
- Sort and organize the coins and bills into separate piles. You can use small containers or cups to keep them organized.
- Once everything is sorted, begin counting each pile. You can use a calculator or count manually, whichever method you prefer.
- Keep a record of the amount you’ve counted. This will help you keep track of your savings and set financial goals for the future.
Remember, counting the contents of your money box can be a fun activity, so involve your family or friends to make it even more enjoyable.
Cleaning and Repairing the Money Box
Keeping your money box clean and well-maintained is essential to ensure its longevity and functionality. Here are some tips on how to clean and repair your money box:
- Cleaning:
- Regularly dust off your money box using a soft cloth or a feather duster. This will prevent dirt and debris from accumulating on the surface.
- If your money box is made of plastic or metal, you can use a mild soap solution and a soft sponge or cloth to clean it. Make sure to rinse it thoroughly and dry it completely before using it again.
- For wooden money boxes, avoid using water directly on the surface. Instead, use a dry cloth or a wood cleaning solution to gently wipe the box.
- Remove any stickers or decals that may have lost their adhesive or are peeling off. This will keep your money box looking neat and presentable.
- Repairing:
- If your money box has loose corners or weak joints, you can reinforce them using strong glue or tape. Apply the adhesive to the affected area and hold it firmly until it dries.
- In case the coin slot or any other part of your money box gets damaged, you can consider repairing or replacing it. Contact the manufacturer or a professional to assist you with the necessary repairs.
Taking care of your money box will not only keep it in good condition but also ensure that your savings are secure. Make cleaning and maintenance a regular habit to enjoy your money box for years to come.
Remember, a well-maintained money box can serve as a visual reminder of your financial goals and a source of motivation to keep saving. So, enjoy the process and watch your savings grow!