Interested in making candles at home to sell? This step-by-step guide covers everything you need to know, from the materials needed to safety precautions, different candle types, packaging ideas, and tips for successful selling. Start your candle-making journey today!
Materials Needed for Making Candles at Home to Sell
So, you’re interested in making candles at home to sell? That’s fantastic! Not only is candle-making a fun and creative hobby, but it can also be a profitable business venture. To get started, you’ll need a few essential materials. Let’s take a closer look at each one:
Wax
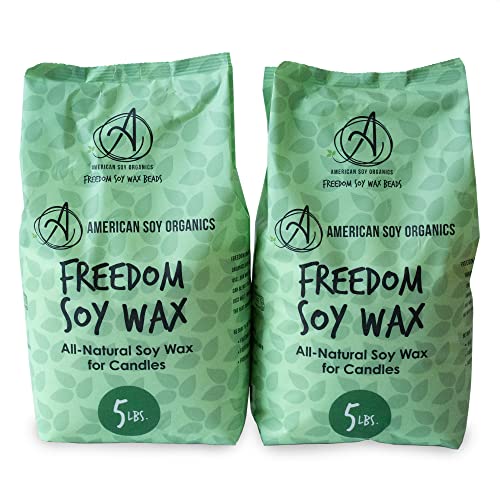
The first and most important ingredient in candle-making is, of course, wax. Wax serves as the fuel for your candle, providing the substance that will melt and create the beautiful glow when the wick is lit. There are several types of wax available, including soy wax, beeswax, and paraffin wax. Each type has its own unique qualities and characteristics, so it’s worth experimenting with different waxes to find the one that suits your needs best.
Wick
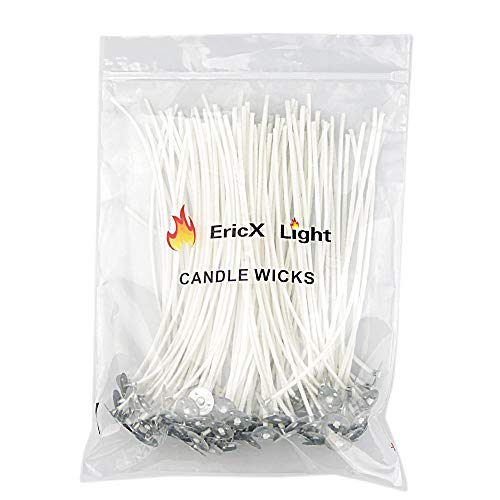
Next up, you’ll need a wick. The wick is what carries the flame and allows the wax to melt and burn. Choosing the right wick is crucial for a successful candle. You’ll want to consider the size and diameter of your candle when selecting a wick. It’s also important to ensure that your wick is made from a material that burns cleanly and doesn’t produce excessive smoke or soot.
Fragrance Oils
If you want to create scented candles, fragrance oils are a must-have. These oils come in a wide range of scents, from floral and fruity to warm and cozy. When choosing fragrance oils, it’s important to select high-quality oils that are specifically designed for candle-making. This will ensure that your candles have a strong and long-lasting scent.

Dyes
To add color to your candles, you’ll need dyes. Dyes come in various forms, including liquid dyes, powder dyes, and dye blocks. It’s important to choose dyes that are specifically formulated for candle-making, as these will be heat-resistant and produce vibrant colors. Experimenting with different dye combinations can add a touch of uniqueness to your candles and help them stand out from the crowd.
Containers
Containers are an essential part of candle-making, as they not only hold the wax but also contribute to the overall aesthetic appeal of the finished product. You can choose from a wide range of containers, including glass jars, tin cans, ceramic vessels, and even recycled containers. When selecting containers, consider the size, shape, and style that best complement your candles and align with your brand identity.
Thermometer
A thermometer is a handy tool to have when making candles, as it allows you to monitor the temperature of the wax. Maintaining the correct temperature is crucial for successful candle-making, as it ensures that the wax melts evenly and adheres properly to the wick. There are various types of thermometers available, but a digital candy thermometer or a laser infrared thermometer are popular choices among candle-makers.
Heat Source
Finally, you’ll need a reliable heat source to melt your wax. This can be a double boiler, a melting pot, or even a slow cooker. The heat source you choose will depend on the quantity of candles you plan to make and your personal preference. It’s important to use caution and follow safety guidelines when working with heat sources to prevent accidents and ensure a smooth candle-making process.
In summary, to make candles at home to sell, you’ll need wax, a wick, fragrance oils, dyes, containers, a thermometer, and a heat source. These materials are the building blocks of candle-making and will allow you to create beautiful and high-quality candles that customers will love. Now that you have your materials ready, it’s time to move on to the next step: safety precautions. But before we do that, let’s quickly recap the materials you’ll need in an easy-to-read table format:

| Materials Needed for Making Candles at Home to Sell |
|---|
| – Wax |
| – Wick |
| – Fragrance Oils |
| – Dyes |
| – Containers |
| – Thermometer |
| – Heat Source |
Now that you have a clear understanding of the materials required, let’s dive into the safety precautions you need to keep in mind when making candles at home to sell.
Safety Precautions for Making Candles at Home to Sell
Candle making is a fun and rewarding hobby that can also be turned into a profitable business. However, it’s important to prioritize safety when working with potentially hazardous materials and processes. By taking the necessary precautions, you can ensure a safe and enjoyable candle-making experience. In this section, we will discuss the key safety measures to follow when making candles at home to sell.
Proper Ventilation
Proper ventilation is crucial when working with wax, fragrance oils, and dyes. These materials can release fumes that may be harmful if inhaled in large quantities. Ensure that your workspace has good airflow to minimize the concentration of these fumes. Open windows or use fans to improve ventilation. If possible, consider setting up a dedicated area with an exhaust fan to further enhance the air quality.
Protective Clothing
Wearing the right protective clothing is essential to safeguard yourself from potential hazards. When making candles, it is recommended to wear long sleeves, long pants, and closed-toe shoes to protect your skin from hot wax and accidental spills. Additionally, consider wearing an apron or smock to prevent stains on your clothes. It’s also a good idea to use heat-resistant gloves to handle hot materials and protect your hands.
Fire Safety Measures
Candle making involves working with heat sources, which can pose a fire risk if not handled properly. To minimize the risk of fire, ensure that your workspace is free from flammable materials such as paper or fabric. Keep a fire extinguisher nearby and know how to use it. Never leave melting wax unattended, and always extinguish any open flames or heat sources when you’re done working. It’s better to be safe than sorry!
Handling Hot Wax
Hot wax can cause severe burns if mishandled. Always exercise caution when working with melted wax. Use a double boiler or a dedicated melting pot to melt your wax, and never heat it directly on a stovetop or in a microwave. When pouring the melted wax, make sure to use a heat-resistant container and handle it with care. If any wax spills onto your skin, immediately cool it down with cold water and seek medical attention if necessary.
Using Fragrance Oils and Dyes Safely
Fragrance oils and dyes are commonly used to add scent and color to candles. While they enhance the overall appeal of your products, it’s important to use them safely. Always follow the recommended guidelines provided by the manufacturer for the appropriate usage and concentration of fragrance oils and dyes. Some oils and dyes may have specific safety precautions, so be sure to read the labels carefully. Additionally, avoid direct contact with these materials on your skin or eyes and wash your hands thoroughly after handling them.
Step-by-Step Guide to Making Candles at Home to Sell
Making candles at home can be a fun and rewarding hobby, and it can also be a great way to earn some extra income by selling your creations. Whether you are a beginner or have some experience in candle making, this step-by-step guide will walk you through the process of making candles at home to sell. So, let’s get started!
Preparing the Work Area
Before you begin making candles, it is important to set up a dedicated work area. This will ensure that you have all the necessary tools and materials within reach and that you can work safely and efficiently.
- Clear and Clean Surface: Start by clearing a clean surface where you can comfortably work. This could be a countertop, table, or even a dedicated workbench. Make sure that the surface is free from any clutter or debris.
- Covering and Protection: To protect your work surface, consider covering it with a heat-resistant mat or a layer of newspaper. This will catch any spills or drips and make cleanup easier.
- Organize Tools and Materials: Gather all the materials and tools you will need for candle making and organize them within easy reach. This includes wax, wicks, fragrance oils, dyes, containers, a thermometer, and a heat source. Having everything organized will save you time and minimize distractions during the candle-making process.
Melting the Wax
Melting the wax is a crucial step in candle making. It is important to melt the wax properly to ensure a smooth and even burn for your candles.
- Double Boiler Method: The most common method for melting wax is the double boiler method. Fill a large pot with water and bring it to a simmer. Place a smaller pot or heat-resistant container inside the larger pot. Add the wax to the smaller pot and let it melt slowly over low to medium heat. This indirect method prevents the wax from scorching or catching fire.
- Temperature Control: Use a thermometer to monitor the temperature of the wax. Different types of wax have different melting points, so it is important to follow the manufacturer’s instructions. Generally, the ideal melting temperature for most waxes is between 160°F and 180°F (71°C and 82°C).
- Stirring and Mixing: Stir the wax occasionally to ensure even melting and to prevent any hot spots. Once the wax has completely melted, you can add fragrance oils and dyes to customize the scent and color of your candles. Stir gently but thoroughly to distribute the fragrance and color evenly throughout the wax.
Adding Fragrance and Dye
Adding fragrance and dye to your candles is where you can get creative and make your candles truly unique. It is important to add the fragrance and dye at the right temperature to ensure they mix well with the wax.
- Fragrance Oils: When adding fragrance oils, it is best to do so when the wax has cooled down to around 140°F to 150°F (60°C to 65°C). This temperature allows the fragrance to bind with the wax without evaporating too quickly. Add the desired amount of fragrance oil, usually around 1 ounce per pound of wax, and stir gently to combine.
- Dyes: If you want to add color to your candles, use liquid or dye chips specifically designed for candle making. The best time to add the dye is when the wax has cooled down to around 180°F to 190°F (82°C to 88°C). Start with a small amount of dye and gradually add more until you achieve the desired color. Remember to stir well to ensure an even distribution of color.
- Testing and Experimenting: It is always a good idea to test your fragrance and dye combinations before making a large batch of candles. This will help you determine the ideal amount of fragrance and dye for the desired scent and color intensity. Keep a record of your experiments so you can replicate successful combinations in the future.
Preparing the Wick and Container
The wick and container play a crucial role in the overall performance and aesthetics of your candles. Proper preparation of the wick and container ensures that your candles burn evenly and safely.
- Choosing the Right Wick: The size and type of wick you choose depend on the diameter of your container and the type of wax you are using. Consult a wick chart or the manufacturer’s recommendations to select the appropriate wick size. Trim the wick to the desired length, leaving about 1/4 inch (6mm) above the wax surface.
- Securing the Wick: To keep the wick centered and upright during the pouring process, you can use wick stickers or hot glue to secure it to the bottom of the container. Make sure the wick is straight and taut before proceeding to the next step.
- Preparing the Container: Clean and dry the container before pouring the wax. This ensures that no dust or debris will interfere with the appearance of your finished candle. If desired, you can also decorate the container with ribbons, labels, or other embellishments to enhance its visual appeal.
Pouring the Wax
Now that you have prepared the wax, fragrance, dye, wick, and container, it’s time to pour the wax into the container. This step requires steady hands and careful pouring to avoid spills or splashes.
- Slow and Controlled Pouring: Hold the container with one hand and use the other hand to pour the melted wax slowly and steadily into the container. Pour the wax in a controlled manner to avoid overflowing or creating air bubbles. Fill the container to the desired level, leaving some space at the top for the finishing touches.
- Avoiding Temperature Shock: It is important to pour the wax at the right temperature, usually between 130°F and 150°F (54°C and 65°C). Pouring the wax at a lower temperature may result in uneven adhesion to the container, while pouring at a higher temperature can cause the wax to shrink and create sinkholes.
Cooling and Finishing Touches
Once you have poured the wax into the container, it’s time to let it cool and add the finishing touches to your homemade candles.
- Cooling and Setting: Allow the candles to cool and set undisturbed at room temperature. This process usually takes several hours, depending on the size and type of candle. Avoid moving or disturbing the candles during this time to ensure a smooth and even finish.
- Trimming the Wick: After the candles have cooled completely, trim the wick to a length of about 1/4 inch (6mm). This will help promote a clean and even burn. Remember to trim the wick before each use to prevent excessive smoke and uneven burning.
- Packaging and Labeling: Once your homemade candles are fully finished, it’s time to package and label them for sale. Choose packaging materials that are both visually appealing and practical for shipping and display purposes. Consider using eco-friendly and sustainable packaging options to attract environmentally conscious customers. Label each candle with its scent, ingredients, and safety instructions.
Different Types of Candles to Make and Sell
Candle making is an art that offers endless possibilities when it comes to the types and styles of candles you can create. Whether you are making candles for personal use or planning to sell them, it’s important to understand the different types of candles available in the market. In this section, we will explore various types of candles that you can make and sell, including container candles, pillar candles, votive candles, tea light candles, floating candles, and taper candles.
Container Candles
Container candles are one of the most popular types of candles, known for their versatility and ease of use. These candles are made by pouring melted wax into containers such as jars, tins, or glass vessels. The container not only holds the wax but also acts as a decorative element. You can experiment with different container shapes, sizes, and materials to create unique and eye-catching designs.
To make container candles, start by selecting the appropriate container that complements the style and theme you want to achieve. Next, choose a wax that is suitable for container candles, such as soy wax or paraffin wax. Melt the wax and add fragrance oils and dyes according to your desired scent and color. Place a wick in the center of the container and pour the melted wax carefully. Allow the candle to cool and set before trimming the wick and adding any finishing touches.
Container candles offer a great opportunity to showcase your creativity by experimenting with various container styles, colors, and decorations. They are also popular among customers due to their convenience and ability to blend seamlessly with any decor.
Pillar Candles
Pillar candles are elegant and versatile candles that can make a statement in any setting. These candles are freestanding and do not require a container. Instead, they are molded or carved into a pillar shape, hence the name. Pillar candles come in various sizes, from small votive-like pillars to large centerpiece-worthy ones.
To make pillar candles, you will need a mold specifically designed for pillar candles. There are various types of molds available, including metal, silicone, or plastic. Choose a mold that suits your desired size and shape. Melt the wax, add fragrance oils and dyes if desired, and carefully pour the melted wax into the mold. Insert a wick in the center and let the candle cool and solidify. Once the candle has set, remove it from the mold and trim the wick.
Pillar candles are perfect for creating a warm and inviting ambiance. They can be used as standalone decorative pieces or combined with other candles and accessories to create stunning centerpieces.
Votive Candles
Votive candles are small, cylindrical candles that are often placed in votive holders or cups for burning. These candles are known for their versatility, as they can be used as decorative accents or as part of religious or ceremonial rituals. Votive candles come in a wide range of colors and scents, making them a popular choice for both personal use and gifting.
To make votive candles, you can use pre-made votive molds or repurpose small glass containers. Melt the wax, add fragrance oils and dyes if desired, and carefully pour the melted wax into the mold or container. Place a pre-tabbed votive wick in the center and allow the candle to cool and solidify. Once the candle has set, trim the wick to the desired length.
Votive candles are a great option if you want to experiment with different scents and colors without committing to larger candles. They can be grouped together to create stunning displays or used individually to add a touch of elegance to any space.
Tea Light Candles
Tea light candles are small, shallow candles that are usually housed in a metal or plastic cup. These candles are designed to burn for a shorter duration, typically around 4-6 hours. Tea light candles are commonly used as decorative accents, especially in events or occasions that require multiple candles.
To make tea light candles, you will need tea light molds or heat-resistant cups. Melt the wax, add fragrance oils and dyes if desired, and carefully pour the melted wax into the molds or cups. Insert a pre-tabbed tea light wick in the center and allow the candle to cool and solidify. Once the candles have set, trim the wick to a suitable length.
Tea light candles are popular for their affordability and versatility. They can be used in various settings, such as romantic dinners, weddings, or even as emergency lighting during power outages.
Floating Candles
Floating candles are a unique and enchanting addition to any decorative arrangement. As the name suggests, these candles are designed to float on water. Floating candles are commonly used in centerpieces, water features, or as a focal point in decorative bowls.
To make floating candles, you will need a mold specifically designed for floating candles or a heat-resistant container. Melt the wax, add fragrance oils and dyes if desired, and carefully pour the melted wax into the mold or container. Insert a pre-tabbed wick in the center or use a wick holder to keep the wick in place. Allow the candle to cool and solidify before removing it from the mold or container.
Floating candles offer a captivating visual effect and can create a serene and romantic atmosphere. Experiment with different shapes, sizes, and colors to create stunning floating candle displays.
Taper Candles
Taper candles are long, slender candles that are often associated with formal occasions or religious ceremonies. These candles are known for their elegant and timeless appeal. Taper candles are usually placed in candle holders or candelabras and can add a touch of sophistication to any setting.
To make taper candles, you will need taper molds or heat-resistant containers. Melt the wax, add fragrance oils and dyes if desired, and carefully pour the melted wax into the molds or containers. Insert a pre-tabbed taper wick in the center and allow the candle to cool and solidify. Once the candles have set, remove them from the molds or containers and trim the wicks to the desired length.
Taper candles are a classic choice for formal dining tables, weddings, or religious ceremonies. Their slender shape and steady burn make them a popular choice for creating a warm and inviting atmosphere.
Packaging and Presentation Ideas for Selling Homemade Candles
When it comes to selling homemade candles, packaging and presentation play a crucial role in attracting customers and creating a memorable experience. In this section, we will explore some key ideas and strategies for packaging and presenting your candles in a way that sets them apart from the competition.
Choosing the Right Packaging Materials
The first step in creating an appealing packaging for your homemade candles is to choose the right materials. Consider the following options:
- Glass Jars: Glass jars are a classic choice for container candles. They not only showcase the beauty of the candle but also allow customers to see the color and texture of the wax. Opt for high-quality glass jars that are both aesthetically pleasing and durable.
- Tins and Metal Containers: Tins and metal containers are another popular option for packaging candles. They offer a unique and rustic look that can appeal to a wide range of customers. Look for containers that are sturdy and have a secure lid to ensure the candles stay fresh and protected.
- Recycled Materials: For those who want to embrace sustainability, consider using recycled materials for packaging. This could include cardboard boxes, paper bags, or even repurposed containers. Not only will this appeal to eco-conscious customers, but it also adds a unique touch to your candles.
Labeling and Branding
Labeling and branding are essential for establishing your candle business and creating a professional image. Here are some tips to consider:
- Create a Logo: Design a logo that represents your brand and visually communicates the essence of your candles. This will help customers recognize your products and differentiate them from others in the market.
- Label Information: Your candle labels should include important information such as the scent, burn time, and any safety warnings. Make sure the font is easy to read and the labels are securely attached to the packaging.
- Consistent Branding: Use consistent colors, fonts, and design elements across all your packaging and marketing materials. This will create a cohesive and recognizable brand identity.
Creative Display Options
To make your candles stand out, it’s important to think creatively when it comes to displaying them. Consider the following ideas:
- Tiered Displays: Use tiered displays to create depth and visual interest. This can be achieved with shelves, risers, or even repurposed furniture. Arrange your candles in an eye-catching way to draw customers’ attention.
- Themed Displays: Create themed displays that align with the seasons or specific occasions. For example, during the holiday season, you could create a display featuring candles with festive scents and colors.
- Sample Stations: Set up sample stations where customers can smell different candle scents before making a purchase. This allows them to experience the fragrance firsthand and increases the likelihood of a sale.
Gift Set Ideas
Offering gift sets is a great way to attract customers and increase sales. Here are some gift set ideas to consider:
- Scented Trio: Create a set of three candles with complementary scents. This allows customers to mix and match fragrances to create their own unique ambiance.
- Seasonal Sets: Develop gift sets that are tailored to specific seasons or holidays. For example, a summer-themed gift set could include candles with refreshing scents like citrus or ocean breeze.
- Customizable Sets: Offer customers the option to create their own gift sets by selecting their preferred candle scents and packaging. This allows for a personalized and thoughtful gift-giving experience.
Marketing and Selling Online
In today’s digital age, it’s important to have a strong online presence to reach a wider audience. Here are some tips for marketing and selling your homemade candles online:
- Create a Website: Build a user-friendly website where customers can browse and purchase your candles. Include high-quality product images, detailed descriptions, and an easy-to-use checkout process.
- Social Media Marketing: Utilize social media platforms like Instagram and Facebook to showcase your candles and engage with potential customers. Post visually appealing photos, share behind-the-scenes content, and run targeted ads to increase your reach.
- Collaborate with Influencers: Partner with influencers or bloggers in the home decor or lifestyle niche to promote your candles. Their endorsement can help boost your brand visibility and attract new customers.
Tips for Successfully Selling Homemade Candles
Selling homemade candles can be a rewarding and profitable business venture. However, to succeed in this competitive market, it is essential to understand some key tips that will help you stand out from the crowd. In this section, we will explore the importance of identifying your target market, pricing your candles effectively, promoting your products, building customer relationships, and expanding your product line. By following these tips, you can maximize your chances of success in the candle-making industry.
Identifying Your Target Market
Before diving into the business of selling homemade candles, it is crucial to identify your target market. Who is most likely to buy your candles? Are they environmentally-conscious individuals, luxury candle enthusiasts, or those seeking unique and personalized gifts? Understanding your target market will allow you to tailor your products, marketing efforts, and branding to meet their specific needs and preferences.
To identify your target market, consider conducting market research. This can involve surveys, focus groups, or analyzing the demographics and interests of existing candle buyers. By gaining insights into your target market’s demographics, lifestyle, and purchasing behavior, you can develop marketing strategies that resonate with them.
Pricing Your Candles
Determining the right price for your homemade candles is essential for both profitability and attracting customers. When setting your prices, consider factors such as the cost of materials, labor, overhead expenses, and desired profit margin. Additionally, research the market to understand the average prices of similar candles.
While it may be tempting to underprice your candles to attract customers, it is important to find a balance that reflects the value and quality of your products. Experiment with different pricing strategies, such as tiered pricing or bundling, to find what works best for your target market and business goals.
Promoting Your Candles
Effective promotion is crucial for successfully selling homemade candles. To effectively promote your products, consider the following strategies:
- Online Presence: Create a visually appealing website or online store where customers can browse and purchase your candles. Optimize your website for search engines to increase visibility. Leverage social media platforms to engage with potential customers, sharing captivating visuals and engaging content.
- Local Events and Markets: Participate in local craft fairs, farmers markets, or pop-up events to showcase your candles. These events provide opportunities to interact with customers, receive feedback, and build brand awareness.
- Collaborations and Partnerships: Collaborate with influencers, bloggers, or local businesses that align with your target market. This can help expand your reach and attract new customers.
- Customer Testimonials and Reviews: Encourage satisfied customers to leave reviews and testimonials on your website or social media platforms. Positive feedback can build trust and credibility, attracting new customers.
- Email Marketing: Build an email list and send regular newsletters to keep customers updated on new products, promotions, or special offers. Personalize your emails to establish a connection with your audience.
Building Customer Relationships
Building strong customer relationships is vital for long-term success in the homemade candle business. Happy and loyal customers can become brand ambassadors, recommending your candles to others. Here are some tips for building customer relationships:
- Excellent Customer Service: Provide exceptional customer service by promptly responding to inquiries, resolving issues, and going the extra mile to ensure customer satisfaction.
- Personalization: Customize the candle-buying experience by offering personalized scents, packaging, or messages. This personal touch can make customers feel valued and increase their loyalty.
- Reward Programs: Implement a reward program to incentivize repeat purchases. This can include discounts, freebies, or exclusive access to new products.
- Communication: Regularly communicate with your customers through email newsletters or social media updates. Share behind-the-scenes insights, product development stories, or tips on how to make candles last longer.
Expanding Your Product Line
To stay relevant and attract a wider customer base, consider expanding your product line beyond traditional candles. Here are some ideas to diversify your offerings:
- Aromatherapy Candles: Create candles infused with essential oils known for their therapeutic benefits, such as lavender for relaxation or citrus for energy.
- Seasonal Candles: Develop candles that reflect the changing seasons or upcoming holidays. This can include scents like pumpkin spice for fall or peppermint for Christmas.
- Customized Candles: Offer personalized candles where customers can choose their preferred fragrance, color, and packaging. This allows customers to create unique gifts or keepsakes.
- Candle Accessories: Expand your product line to include candle accessories like decorative holders, snuffers, or wick trimmers. This not only complements your candles but also provides additional revenue streams.
By continuously innovating and expanding your product line, you can cater to different customer preferences and attract a broader audience.
Troubleshooting Common Candle-Making Issues
Making candles at home can be a fulfilling and creative hobby that can also turn into a profitable business. However, like any craft, it comes with its own set of challenges. In this section, we will explore some common candle-making issues and provide you with practical solutions to troubleshoot them.
Sinking or Cracking Wax
One of the most frustrating problems candle makers encounter is when their wax sinks or cracks after it has cooled down. This can happen due to a variety of reasons, including improper pouring temperatures, incorrect wax formulations, or poor container choices.
To prevent sinking or cracking wax, it’s essential to follow proper pouring temperatures recommended for the specific type of wax you are using. Different waxes have different melting and pouring temperatures, so it’s crucial to read the manufacturer’s instructions carefully.
In addition, ensure that you are using the appropriate wax formulation for the type of candle you are making. Some waxes are specifically designed for container candles, while others are better suited for pillar candles. Using the wrong wax can lead to structural issues and result in sinking or cracking.
Lastly, consider the container you are using. Glass containers, for example, can retain more heat and increase the chances of cracking. Opt for containers with thicker walls or use a heat-resistant material like metal or ceramic to avoid this problem.
Poor Scent Throw
The scent throw of a candle refers to how well the fragrance fills the surrounding space when the candle is burning. Poor scent throw can be disappointing, especially if you are looking to create aromatic candles that captivate the senses.
To improve scent throw, start by ensuring you are using high-quality fragrance oils specifically formulated for candle making. Lower-quality oils may not have the same potency and can result in weak scent throw.
Next, consider the wax you are using. Some waxes have better scent absorption properties than others. Experiment with different waxes to find one that enhances the fragrance and provides a stronger scent throw.
Proper wick selection is also crucial for achieving optimal scent throw. A wick that is too small may not create enough heat to release the fragrance, while a wick that is too large can cause the candle to burn too hot, leading to poor scent diffusion. Test different wick sizes to find the right balance.
Lastly, consider the room size and ventilation. A larger room or one with poor airflow may require a stronger fragrance or additional candles to achieve the desired scent throw. Experiment with different placement and quantities to find the perfect balance.
Tunneling or Uneven Burning
Tunneling or uneven burning occurs when a candle burns down the center, leaving a tunnel of unburned wax around the wick. This not only affects the aesthetics but also reduces the overall burn time of the candle.
To prevent tunneling, it’s important to properly maintain the candle during the first burn. When you light a new candle, allow it to burn long enough for the entire surface to melt into a pool of wax. This process, known as “establishing a memory burn,” ensures that the candle will continue to burn evenly throughout its lifespan.
Trimming the wick to the recommended length before each burn is also essential. A long wick can create a larger flame that melts the wax too quickly, causing tunneling. Keeping the wick at the correct length will help maintain a steady burn and prevent uneven melting.
Using a larger diameter wick, especially for wider candles, can also help prevent tunneling. A wider wick provides more heat, allowing the wax to melt evenly and avoid tunnel formation.
Lastly, consider the ambient temperature when burning your candles. Placing them in drafty areas or near air conditioning vents can disrupt the even burn and lead to tunneling. Find a stable and draft-free location for your candles to ensure a consistent burn.
Wick Related Problems
Wick-related problems can manifest in different ways, such as excessive smoking, mushrooming, or wick drown-out. These issues can affect the overall burn quality and appearance of your candles.
Excessive smoking occurs when the wick produces too much soot or releases black smoke while burning. This can be caused by using a wick that is too large for the candle’s diameter or a wick that contains a metal core. To resolve this issue, choose a smaller wick size or opt for a wick without a metal core.
Mushrooming happens when the top of the wick forms a carbon buildup, resembling a mushroom shape. This can lead to increased smoking and soot production. To prevent mushrooming, trim the wick to the recommended length before each burn and ensure proper ventilation to avoid excessive carbon buildup.
Wick drown-out occurs when the wick is unable to draw up enough liquid wax to sustain the flame. This can happen if the wick is too small or if the candle’s diameter is too wide. To address this issue, choose a larger wick size or consider using multiple wicks for wider candles.
Regularly monitoring and trimming the wick can help prevent these problems and ensure a clean and even burn.
Frosting or Air Bubbles
Frosting refers to the white crystalline layer that can appear on the surface of soy or natural wax candles. While it doesn’t affect the performance of the candle, it can impact its visual appeal.
Frosting occurs due to the natural characteristics of soy or natural waxes and is more prevalent in cooler temperatures. To minimize frosting, store your finished candles in a cool environment and avoid exposing them to extreme temperature changes.
Air bubbles can also detract from the appearance of your candles. They can form during the pouring process when the wax cools too quickly or if there are impurities in the wax.
To reduce the occurrence of air bubbles, ensure that you are pouring the wax at the recommended temperature and avoid stirring the wax vigorously during the melting process. If air bubbles do appear, you can use a heat gun or hairdryer to gently warm the surface of the candle and remove them.
In conclusion, troubleshooting common candle-making issues requires attention to detail and experimentation. By following the tips and techniques mentioned above, you can overcome these challenges and create beautiful, high-quality candles that will delight your customers. Remember to be patient and persistent, as mastering the art of candle making takes practice and experience.