Want to make a money necklace? Follow our to create a unique accessory using currency bills. Learn how to choose the right bills, prepare them, and attach them to a jewelry wire. Add your personal touch with tips and tricks for a professional look.
Materials Needed to Make a Money Necklace
Are you looking for a unique and eye-catching accessory that will make heads turn? Look no further than a money necklace! With just a few materials, you can create a stunning piece of jewelry that combines fashion and currency. In this section, we will discuss the key materials you will need to make your very own money necklace: currency bills, jewelry wire, and crimp beads.
Currency Bills
The first essential material for your money necklace is currency bills. You can choose bills from your own country or even opt for foreign currency for a more exotic touch. The type of currency you select will depend on your personal preference and the availability of different designs.
When choosing currency bills for your necklace, it’s important to consider their condition. Bills in good condition will ensure that your necklace looks neat and professional. Avoid using bills that are torn, wrinkled, or stained, as they may detract from the overall appearance of your necklace.
Additionally, the size of the bills is another factor to keep in mind. Different countries have varying bill sizes, so it’s essential to select bills that will fit well within the design of your necklace. Larger bills may require more folding and may not be suitable for intricate patterns, while smaller bills can be used to create more delicate and detailed designs.

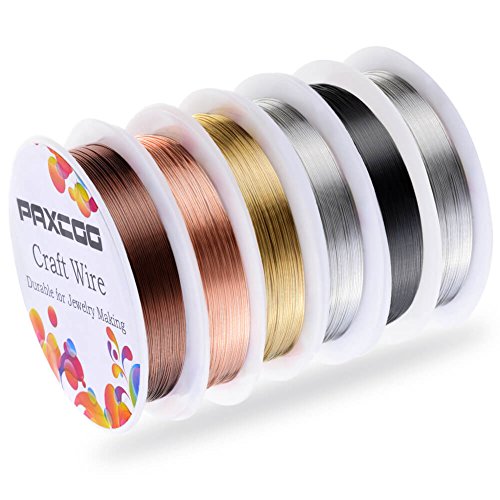
Jewelry Wire
To bring your money necklace to life, you will need jewelry wire. Jewelry wire is a flexible and durable material that will serve as the base for your necklace. It comes in various gauges, or thicknesses, so you can choose the one that best suits your design.
Measuring and cutting the jewelry wire to the desired length is an essential step in creating your necklace base. You can use a ruler or measuring tape to ensure accuracy. Once you have determined the length, you can easily cut the wire using wire cutters or scissors.
Crimp Beads
Crimp beads are small metal beads that are used to secure the ends of the jewelry wire and prevent the currency bills from sliding off. These beads play a crucial role in ensuring the longevity and stability of your money necklace.
To attach the crimp beads, you will need crimping pliers. These specialized pliers are designed to flatten the crimp beads, creating a secure connection. Simply thread the wire through the crimp bead, loop it back through, and use the crimping pliers to flatten the bead. This will create a tight grip on the wire, keeping everything in place.
In summary, to make a money necklace, you will need , jewelry wire, and crimp beads. Currency bills of your choice, in good condition and the right size, will form the centerpiece of your necklace. Jewelry wire will serve as the base, allowing you to shape and secure the bills. Finally, crimp beads will provide the necessary stability and ensure that your necklace stays intact. With these materials in hand, you are ready to embark on your creative journey of making a stunning money necklace. Let’s move on to the next section to explore how to choose the right currency bills for your necklace design.

Choosing the Right Currency Bills
When it comes to creating a money necklace, one of the most important decisions you’ll need to make is choosing the right currency bills. This will determine the overall look and feel of your necklace, as well as its value. Let’s delve into the different factors to consider when selecting your currency bills.
Type of Currency
The first thing to consider is the type of currency you want to use for your money necklace. You have a wide range of options here, from using bills from your own country to opting for foreign currency. Each type of currency has its own unique characteristics and can add a different element to your necklace.
Using your own country’s currency can be a great way to showcase your national pride. It adds a personal touch and familiarity to the necklace. On the other hand, using foreign currency can give your necklace an exotic and international flair. It can be a conversation starter and a way to showcase your love for travel and different cultures.
Condition of Bills
The condition of the bills you choose is another important factor. You want to make sure that the bills are in good condition and not torn, worn out, or damaged. This is especially important if you want your money necklace to have a professional and polished look.
If you decide to use your own country’s currency, you can easily obtain crisp and new bills from your local bank. However, if you’re using foreign currency, you might need to be more diligent in finding bills in good condition. Consider visiting a currency exchange or seeking out collectors who specialize in foreign currency.
Size of Bills
The size of the bills you choose will also impact the overall design and aesthetic of your money necklace. Different countries have different bill sizes, so it’s essential to consider this aspect when selecting your currency.
If you want a more subtle and delicate necklace, you can opt for smaller-sized bills. They will create a dainty and intricate look when strung together. On the other hand, if you prefer a bold and statement-making necklace, larger-sized bills can be the perfect choice. They will make a strong visual impact and draw attention to your creation.
When it comes to the size of the bills, it’s also crucial to consider the length of your necklace. If you want a shorter necklace, smaller bills might be more suitable. For longer necklaces, larger bills can create a visually appealing and balanced design.
Preparing the Currency Bills
When it comes to making a money necklace, preparing the currency bills is an essential step that sets the foundation for the entire project. In this section, we will discuss the three key aspects of preparing the bills: cleaning them, cutting them into strips, and folding the strips. By following these steps, you will ensure that your currency bills are ready to be transformed into a stunning piece of jewelry.
Cleaning the Bills
Before you start working with the currency bills, it’s important to ensure that they are clean and free from any dirt or debris. Cleaning the bills not only enhances their appearance but also helps to remove any potential allergens or contaminants. Here’s a simple method to clean your currency bills:

- Gather the bills: Collect the bills that you plan to use for your money necklace. Make sure they are in good condition and free from any major tears or damages.
- Use a soft cloth or brush: Take a soft, lint-free cloth or a soft-bristled brush and gently wipe the bills to remove any dust or dirt. Be careful not to apply too much pressure, as you don’t want to damage the bills.
- Avoid using water or chemicals: It’s important to note that currency bills are not designed to withstand moisture or harsh chemicals. Therefore, it is best to avoid using water or any cleaning solutions on the bills.
By following these steps, you can effectively clean your currency bills without causing any damage. Clean bills will not only make your money necklace look more appealing but also ensure that the final piece is hygienic and safe to wear.
Cutting the Bills into Strips
Once your currency bills are clean, the next step is to cut them into strips. These strips will form the base of your money necklace, giving it a unique and eye-catching look. Here’s how you can cut the bills into strips:
- Choose the width of the strips: Decide on the desired width of the strips for your necklace. Generally, a width of around 1 inch works well, but you can adjust it according to your preference.
- Measure and mark: Use a ruler or a measuring tape to measure and mark the width of the strips along the longer side of the bill. Make sure to use a pen or a pencil that won’t bleed or smudge onto the bill.
- Cut along the marked lines: Carefully cut along the marked lines using a pair of sharp scissors. Take your time and ensure that the cuts are straight and clean. Remember to discard any excess material that you don’t need.
- Repeat for all the bills: Repeat the process for each currency bill that you plan to use in your necklace. This will ensure that you have enough strips to create a beautifully layered design.
By cutting the bills into strips, you are transforming them into versatile elements that can be easily manipulated and arranged to create your desired necklace design. This step requires precision and attention to detail, so take your time to ensure that the strips are cut accurately.
Folding the Strips
Folding the currency bill strips is an important step that adds dimension and texture to your money necklace. It allows you to create a visually appealing pattern that showcases the intricate details of the bills. Here’s how you can fold the strips:
- Choose the folding style: There are various folding styles that you can experiment with, such as accordion folds, fan folds, or even origami-inspired folds. Consider the size and design of your currency bills when selecting the folding style.
- Fold the strips: Start folding the strips according to your chosen style. Take your time and make sure each fold is precise and even. You can use your fingers or a bone folder to create crisp folds.
- Experiment with different folding patterns: Don’t be afraid to try different folding patterns and combinations. This will add visual interest and uniqueness to your money necklace. Remember to keep track of the folds you use, as this will help you recreate the design later.
By folding the currency bill strips, you are adding depth and character to your money necklace. The folds create an intriguing texture that will catch the light and draw attention to your jewelry piece. Let your creativity shine as you explore different folding techniques and patterns.

As you can see, preparing the currency bills for your money necklace involves cleaning them, cutting them into strips, and folding the strips. These steps are crucial in creating a solid foundation for your jewelry piece. So grab your currency bills, follow these instructions, and get ready to transform them into a stunning and unique money necklace.
Creating the Necklace Base
When it comes to making a money necklace, creating a sturdy and attractive base is essential. This is the foundation upon which the currency bills will be attached, so it’s important to get it right. In this section, we will explore the key steps involved in creating the necklace base.
Measuring the Jewelry Wire
The first step in creating the necklace base is to measure the jewelry wire. This wire will serve as the main structure of the necklace, providing support for the currency bills. It’s important to choose a wire that is both strong and flexible.
To measure the jewelry wire, start by determining the desired length of the necklace. This will depend on personal preference and the style you want to achieve. Once you have the desired length, add a few extra inches to account for the clasp and any adjustments that may need to be made later on.
Next, using a wire cutter or scissors, carefully cut the wire to the measured length. Be sure to make a clean cut to ensure the wire is not damaged or frayed. Remember, it’s always better to have a slightly longer wire than to come up short.
Forming the Necklace Shape
With the wire cut to the appropriate length, it’s time to shape the necklace. This will determine how the necklace sits on the wearer’s neck and how the currency bills will be displayed. There are various shapes you can choose from, depending on your personal style and the look you want to achieve.
One popular option is a simple loop shape. To create this shape, take one end of the wire and bend it into a small loop. This loop will serve as the starting point for the necklace. Then, carefully shape the wire into a curve, ensuring it is symmetrical and smooth.
Another option is a more intricate design, such as a heart or a spiral. These shapes require a bit more skill and patience, but they can add a unique and eye-catching element to your money necklace. Experiment with different shapes and see which one suits your style best.
Securing the Ends of the Wire
Once you have shaped the necklace, it’s important to secure the ends of the wire to ensure that the currency bills do not slide off. There are several ways to do this, depending on the materials you have available and your personal preference.
One option is to use crimp beads. These small metal beads can be threaded onto the ends of the wire and then squeezed with pliers to hold them in place. This creates a secure and professional-looking finish. Alternatively, you can tie knots at the ends of the wire or use jump rings to attach a clasp.
Regardless of the method you choose, make sure the ends of the wire are securely fastened. You don’t want any accidents where the bills come loose and fall off the necklace. Take your time to ensure everything is properly secured before moving on to the next step.
Tips and Tricks for a Professional Look
Now that we have covered the basics of creating the necklace base, let’s explore some that can take your money necklace to the next level. These small details can make a big difference in the overall appearance and professionalism of your necklace.
Using Clear Nail Polish on Bills
One tip to enhance the look of your currency bills is to use clear nail polish. This can help protect the bills from wear and tear, as well as add a glossy finish. Before attaching the bills to the necklace base, apply a thin layer of clear nail polish to both sides of each bill. Make sure to let it dry completely before proceeding.
Experimenting with Different Currency Designs
If you want to add a touch of uniqueness to your money necklace, consider experimenting with different currency designs. Depending on where you live or your personal preferences, you may have access to various types of currency bills. Mix and match different bills with different colors, sizes, and designs to create a visually appealing and diverse necklace.
Adding Beads or Charms for Decoration
To add some extra flair to your money necklace, consider incorporating beads or charms. These can be added between the currency bills or at the ends of the necklace. Choose beads or charms that complement the colors and themes of the currency bills, and experiment with different arrangements to find the perfect look.
By following these , you can elevate your money necklace from ordinary to extraordinary. Whether it’s using clear nail polish for a polished finish, experimenting with different currency designs, or adding beads and charms for decoration, these small details can make a big impact on the overall appearance of your necklace.
In the next section, we will explore the final steps in creating a money necklace – adding a clasp, adjusting the length, and ensuring the bills lay flat. Stay tuned for more tips and tricks to help you achieve a professional and stylish money necklace.
Attaching the Currency Bills
Stringing the Bills onto the Wire
When it comes to attaching the currency bills to the wire, there are a few steps you need to follow to ensure a secure and visually appealing necklace. First, gather your materials – the jewelry wire and the currency bills you’ve chosen. Make sure the bills are clean and in good condition before proceeding.
To begin, take one end of the jewelry wire and thread it through the hole of one of the currency bills. Pull the wire through until the bill is positioned in the middle of the wire. Repeat this step for the remaining bills, threading them one by one onto the wire. You can choose to alternate the direction in which the bills face, creating an interesting pattern.
Adding Crimp Beads for Security
Once all the currency bills are strung onto the wire, it’s time to add crimp beads for security. Crimp beads are small metal beads that can be compressed to hold the wire in place. They ensure that the bills stay in position and don’t slide around on the wire.
To add the crimp beads, slide one onto the wire, right up against the last currency bill. Use flat-nose pliers to firmly squeeze the crimp bead, securing it in place. Repeat this step for each bill, adding a crimp bead after every bill.
Not only do the crimp beads provide security, but they also add a professional touch to the necklace. They create a neat and polished look, giving the impression that the necklace was crafted with care and attention to detail.
Spacing the Bills Evenly
To achieve a visually pleasing necklace, it’s important to space the bills evenly along the wire. Uneven spacing can make the necklace look unbalanced or messy. Here’s a simple trick to ensure even spacing:
Start by holding the necklace with both hands, one hand at each end of the wire. Gently slide the bills back and forth along the wire until they are evenly distributed. Take your time to adjust the spacing until you are satisfied with the overall look.
If you find that the bills are sliding too easily on the wire and not staying in place, you can add additional crimp beads in between the bills. This will act as a barrier, preventing the bills from moving too freely.
Remember, the goal is to create a necklace that showcases the currency bills in an orderly and aesthetically pleasing manner. By stringing the bills onto the wire, adding crimp beads for security, and spacing them evenly, you’ll be able to achieve a professional and polished look for your money necklace.
Now that you know how to attach the currency bills, let’s move on to the finishing touches in the next section.
Finishing Touches
Adding a Clasp
When it comes to completing your money necklace, adding a clasp is a crucial step. The clasp not only provides a secure closure for your necklace but also adds a touch of elegance to the overall design. There are various types of clasps available in the market, ranging from lobster claw clasps to spring ring clasps. Choose one that matches the style and aesthetic you want to achieve.
To attach the clasp, follow these simple steps:
- Determine the desired placement of the clasp on your necklace. This will depend on the length of the necklace and personal preference. If you want the clasp to be at the back of your neck, ensure that it is positioned accordingly.
- Open the jump ring or split ring that comes with the clasp. These rings act as connectors between the clasp and the necklace. Gently pry open the ring using jewelry pliers or your fingers, being careful not to distort its shape.
- Slide one end of the jewelry wire through the ring, making sure it is securely held in place. If needed, you can add a crimp bead to the wire before attaching it to the ring for added security.
- Close the jump ring or split ring by pushing the ends back together. Ensure that it is tightly closed to prevent the clasp from accidentally coming off.
By adding a clasp, you can easily put on and take off your money necklace whenever you want, while also making it a functional and fashionable accessory.
Adjusting the Length of the Necklace
The length of your money necklace is an essential aspect to consider, as it determines how the necklace will sit on your neck and complement your outfit. It’s important to adjust the length to ensure a comfortable fit and the desired aesthetic appeal.
To adjust the length of your necklace, follow these steps:
- Determine the desired length based on your personal preference and the style you want to achieve. You can measure the length by placing a flexible measuring tape around your neck or by using a string and measuring it against a ruler.
- If you find that the necklace is too long, you can easily shorten it by removing a few currency bills. Carefully detach the bills from the wire, starting from one end, until you reach the desired length.
- On the other hand, if the necklace is too short, you can add extra length by attaching additional currency bills. Simply cut a new strip of bill and fold it as per the instructions in the previous sections. Then, string it onto the wire, ensuring that it is evenly spaced with the existing bills.
- Once you have made the necessary adjustments, reattach the clasp to secure the ends of the wire and maintain the desired length.
Remember to try on the necklace after each adjustment to ensure that it sits comfortably and looks visually pleasing. Don’t be afraid to experiment with different lengths to find the perfect fit for you.
Ensuring the Bills Lay Flat
To achieve a professional and polished look for your money necklace, it is crucial to ensure that the currency bills lay flat and are evenly spaced. This will enhance the overall appearance of the necklace and prevent any bills from flipping or twisting.
Here are some tips to ensure that the bills lay flat:
- While stringing the bills onto the wire, make sure that each bill is folded neatly and uniformly. This will help in maintaining a consistent shape and preventing any creases or wrinkles.
- As you add each bill, gently press it against the wire to ensure that it lies flat. This will help in creating a smooth and streamlined look.
- If you notice any bills that are not laying flat, you can use clear nail polish to secure them in place. Apply a small amount of nail polish on the back of the bill and press it firmly against the wire. Allow it to dry completely before handling.
- Additionally, spacing the bills evenly along the wire will help in maintaining a balanced and symmetrical appearance. Take your time while stringing the bills, ensuring that they are evenly distributed.
By following these tips, you can ensure that your money necklace looks professional and visually appealing. Take pride in your creation and enjoy wearing your unique and stylish accessory.
Incorporating an analogy: Creating the finishing touches for your money necklace is like adding the final strokes to a masterpiece. Just as an artist meticulously adds details to bring their artwork to life, you too can add a clasp, adjust the length, and ensure the bills lay flat to complete your stunning money necklace.
Tips and Tricks for a Professional Look
When it comes to creating a money necklace, there are some tips and tricks that can take your design to the next level and give it a professional look. These simple yet effective techniques will enhance the overall appearance of your necklace and make it stand out. Let’s explore some of these tips and tricks below.
Using Clear Nail Polish on Bills
One clever trick to give your currency bills a polished and professional look is to use clear nail polish. This simple technique helps to protect the bills from wear and tear while also adding a glossy finish to them. By applying a thin layer of clear nail polish on both sides of the bills, you can prevent them from getting wrinkled or damaged over time.
To apply the clear nail polish, follow these steps:
- Lay the currency bill on a flat surface.
- Dip a small brush or cotton swab into the clear nail polish.
- Gently brush the nail polish onto the bill, making sure to cover the entire surface.
- Allow the nail polish to dry completely before handling the bill.
Using clear nail polish not only adds a layer of protection to your currency bills but also gives them a professional and shiny appearance that will catch the eye.
Experimenting with Different Currency Designs
Another way to make your money necklace unique and visually appealing is by experimenting with different currency designs. Depending on where you live or where you’ve traveled to, you may have access to a variety of currency bills with different colors, patterns, and images. Incorporating different currency designs into your necklace can create an interesting and eye-catching contrast.
Consider using bills from different countries or even different time periods to add a touch of diversity to your necklace. You can mix and match bills with different colors or choose bills with intricate designs that complement each other. By combining various currency designs, you can create a visually stunning piece of jewelry that tells a unique story.
Adding Beads or Charms for Decoration
To add an extra touch of personalization and style to your money necklace, consider incorporating beads or charms into the design. This allows you to customize the necklace and make it truly unique. By strategically placing beads or charms between the currency bills, you can create a visually appealing pattern that adds depth and dimension to the necklace.
To add beads or charms to your money necklace, follow these steps:
- Select beads or charms that complement the currency bills and the overall theme of your necklace.
- String the beads or charms onto the jewelry wire before adding the currency bills.
- Slide the beads or charms into place between the bills, spacing them evenly.
- Secure the beads or charms in place by adding crimp beads on either side.
By adding beads or charms, you not only enhance the aesthetic appeal of your money necklace but also create a unique piece of jewelry that reflects your personal style.
In conclusion, by using these tips and tricks, you can elevate your money necklace to a whole new level of professionalism. Applying clear nail polish to your bills adds a protective layer and a glossy finish. Experimenting with different currency designs allows you to create a visually interesting and diverse necklace. Adding beads or charms adds a touch of personalization and decoration. So go ahead and get creative with your money necklace, and let your personal style shine through!